Automated GitHub Backup for your Obsidian Vault
Think of your Obsidian vault as a digital garden - a place where your ideas grow and flourish. Just as you wouldn’t want to lose a carefully tended garden to a storm, you need to protect your digital knowledge from potential loss. In this guide, we’ll create an automated system that regularly backs up your Obsidian notes to GitHub, much like having a time machine for your thoughts.
Understanding the Backup Process
Before we dive into the technical details, let’s visualize how our backup system will work:

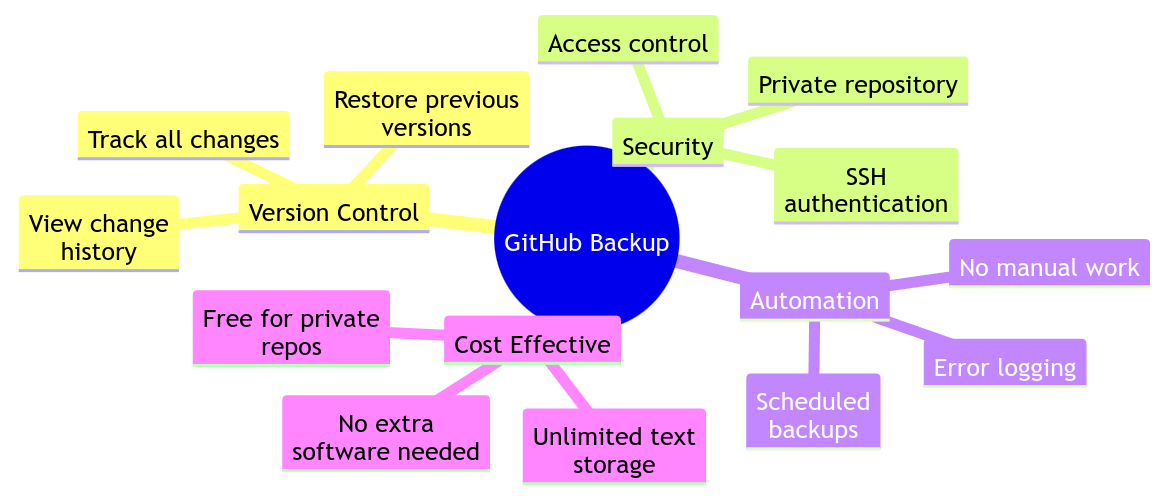
Why GitHub is Your Perfect Backup Partner
GitHub offers several key advantages for backing up your Obsidian vault:
Prerequisites
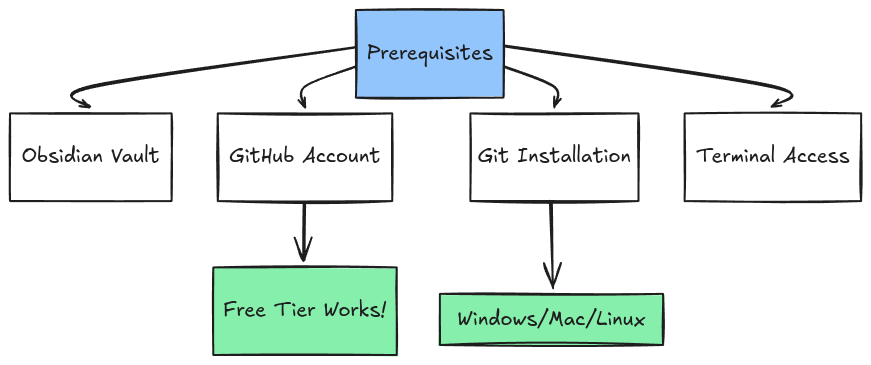
Before we begin our setup, ensure you have:
Step-by-Step Implementation
Step 1: Installing Git
The installation process varies depending on your operating system:
For Windows:
- Visit https://git-scm.com/download/win
- Download and run the installer
- During installation, accept the default options
- Verify the installation by opening Command Prompt and running:
git --version
For Mac:
# Install Homebrew if you haven't already
/bin/bash -c "$(curl -fsSL https://raw.githubusercontent.com/Homebrew/install/HEAD/install.sh)"

# Install Git
brew install git

# Verify installation
git --version
For Linux (Ubuntu/Debian):
sudo apt-get update
sudo apt-get install git

# Verify installation
git --version
Step 2: Configuring Git
Set up your Git identity:
# Configure your name and email
git config --global user.name "Your Name"
git config --global user.email "your.email@example.com"

# Verify your configuration
git config --list
Step 3: Setting Up GitHub
- Create a new repository:
- Visit GitHub.com and log in
- Click the “+” icon → “New repository”
- Name: “obsidian-backup” (or your preferred name)
- Set to “Private”
- Don’t initialize with any files
- Click “Create repository”
- Set up SSH authentication:
# Generate a new SSH key
ssh-keygen -t ed25519 -C "your.email@example.com"

# Start the SSH agent
eval "$(ssh-agent -s)"

# Add your key to the agent
ssh-add ~/.ssh/id_ed25519

# Display your public key to copy it
cat ~/.ssh/id_ed25519.pub
- Add SSH key to GitHub:
- Go to GitHub → Settings → SSH and GPG keys
- Click “New SSH key”
- Paste your public key
- Save
- Test your SSH connection:
ssh -T git@github.com
Step 4: Creating the Backup Script
Create a new file named backup-obsidian.sh:
#!/bin/bash

# Configuration - Update these paths for your system
VAULT_PATH="/path/to/your/obsidian/vault"  # Example: /Users/username/Documents/ObsidianVault
BACKUP_LOG="/path/to/backup.log"           # Example: /Users/username/logs/obsidian-backup.log
GITHUB_REPO="git@github.com:yourusername/obsidian-backup.git"

# Function to log messages with timestamps
log_message() {
    echo "[$(date '+%Y-%m-%d %H:%M:%S')] $1" >> "$BACKUP_LOG"
}

# Create log file if it doesn't exist
touch "$BACKUP_LOG"

# Navigate to vault directory
cd "$VAULT_PATH" || {
    log_message "ERROR: Could not access Obsidian vault directory at $VAULT_PATH"
    exit 1
}

# Initialize git repository if it doesn't exist
if [ ! -d .git ]; then
    log_message "Initializing new Git repository"
    git init
    git remote add origin "$GITHUB_REPO"

    # Create .gitignore file with common exclusions
    cat > .gitignore << EOL
.trash/
.DS_Store
.obsidian/workspace
.obsidian/workspace.json
.obsidian/cache
*.tmp
EOL

    git add .gitignore
    git commit -m "Initial commit: Add .gitignore"
fi

# Pull latest changes to avoid conflicts
log_message "Pulling latest changes from remote repository"
git pull origin main || {
    log_message "WARNING: Could not pull from remote. Continuing with backup..."
}

# Add all changes
log_message "Adding changes to Git"
git add -A

# Check if there are changes to commit
if git diff --cached --quiet; then
    log_message "No changes to backup"
    exit 0
fi

# Commit changes
TIMESTAMP=$(date '+%Y-%m-%d %H:%M:%S')
git commit -m "Automated backup: $TIMESTAMP" || {
    log_message "ERROR: Failed to commit changes"
    exit 1
}

# Push changes
log_message "Pushing changes to remote repository"
git push origin main || {
    log_message "ERROR: Failed to push changes to remote repository"
    exit 1
}

log_message "Backup completed successfully"
Step 5: Making the Script Executable
# Make the script executable
chmod +x backup-obsidian.sh

# Test the script
./backup-obsidian.sh
Step 6: Setting Up the Cron Job
# Open crontab editor
crontab -e

# Add one of these lines based on your preferred schedule:

# Every hour
0 * * * * /full/path/to/backup-obsidian.sh

# Every 30 minutes
*/30 * * * * /full/path/to/backup-obsidian.sh

# Three times a day (8 AM, 2 PM, 8 PM)
0 8,14,20 * * * /full/path/to/backup-obsidian.sh
Step 7: Verifying the Setup
After setting up the cron job, verify everything is working:
# Check if cron is running
service cron status

# View recent cron activity
grep CRON /var/log/syslog

# Check the backup log
tail -f /path/to/backup.log

# View Git status
cd /path/to/your/obsidian/vault
git status
git log --oneline -5  # Shows last 5 commits
Troubleshooting Common Issues
1. Permission Issues
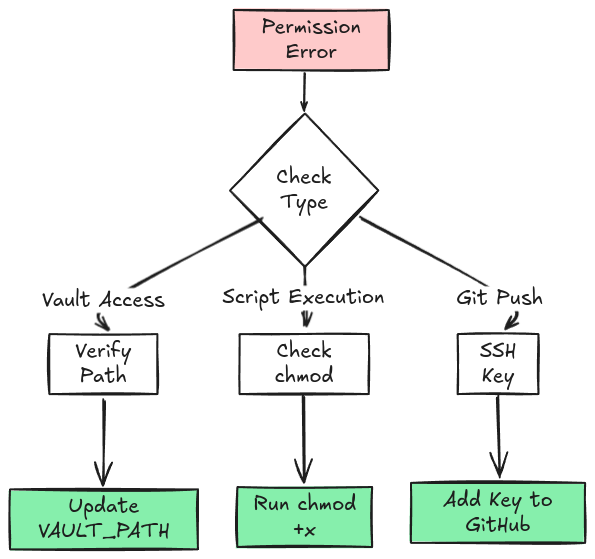
Common issues and their solutions:
Can’t access vault:
# Check directory permissions
ls -la /path/to/vault

# Update script permissions
chmod +x backup-obsidian.sh

# Verify SSH key permissions
chmod 600 ~/.ssh/id_ed25519
chmod 644 ~/.ssh/id_ed25519.pub
Script won’t run:
# Check script ownership
ls -l backup-obsidian.sh

# Update permissions
chmod 700 backup-obsidian.sh
Can’t push to GitHub:
# Test SSH connection
ssh -T git@github.com

# Check remote URL
git remote -v

# Verify repository settings on GitHub
Maintaining Your Backup System
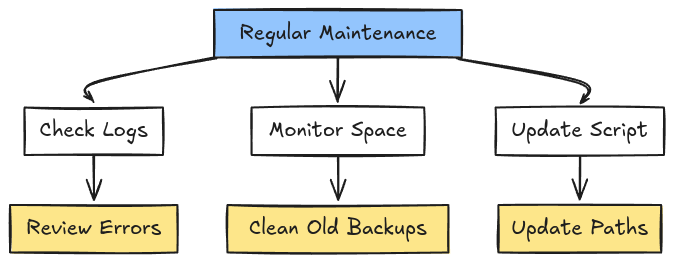
Regular maintenance commands:
# View recent backups
tail -n 50 /path/to/backup.log

# Check repository status
git status
git log --oneline -n 5

# Verify cron job
crontab -l

# Monitor repository size
du -sh .git/
Security Best Practices
# Set proper file permissions
chmod 600 ~/.ssh/id_ed25519     # Private SSH key
chmod 644 ~/.ssh/id_ed25519.pub # Public SSH key
chmod 700 ~/.ssh                # SSH directory
chmod 700 backup-obsidian.sh    # Backup script

# Verify repository privacy settings on GitHub
# - Ensure repository is set to Private
# - Review collaborator access
# - Check deploy keys and webhooks
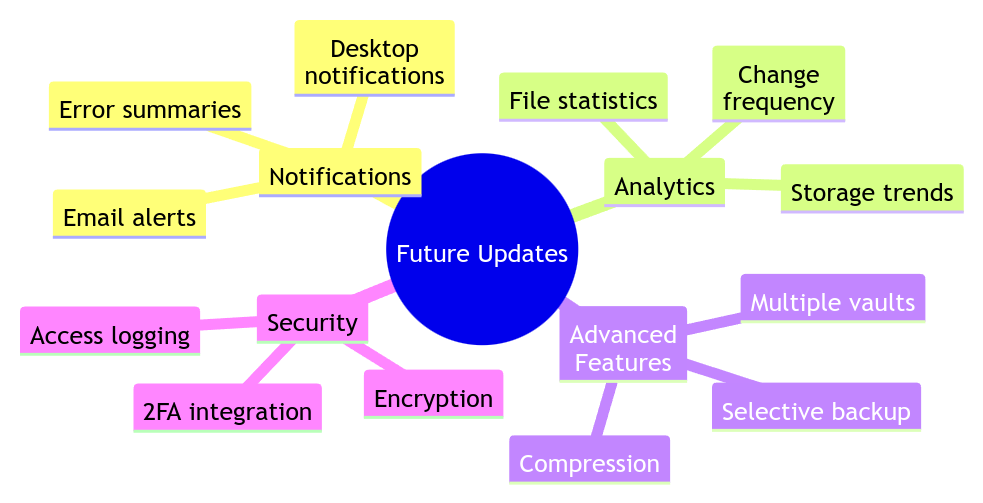
Future Possibilities
Conclusion
With this system in place, you’ve created a reliable safety net for your digital knowledge. Your Obsidian notes are not just stored, but preserved with their full history, ready to be recovered if needed. Think of it as having a time machine for your thoughts - you can always go back and see how your ideas evolved.
Remember to:
- Regularly check your backup logs
- Keep your SSH key secure
- Update the script’s paths if you reorganize your files
- Adjust the backup frequency to match your note-taking rhythm
Happy note-taking, and rest assured that your digital garden is well-protected!
I wrote this guide with the help of Claude 3.5 Sonnet, Anthropic’s AI assistant. The technical content and code examples were created to provide both understanding and practical implementation steps. While the commands and scripts are tested and functional, please verify all paths and settings for your specific setup.